Build an app with AI
You can describe an app in plain English and have an AI assistant write the whole GDN app for you, both files. You don't have to know how to code. The key is giving the AI the right context up front so it writes real GDN code instead of guessing from another platform.
Building with AI is iterative: you reprompt for changes, and you edit the code yourself too, until it looks right. The movies walkthrough shows that loop end to end.
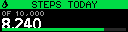

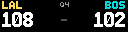
What you'll need
An AI assistant. Any of these work, and the next page helps you pick:
- In your web browser, with no install: ChatGPT or Claude. Easiest way to start.
- On your computer, reading your actual project: Claude Code or the OpenAI Codex CLI. More powerful, a little more setup.
Either way the steps are the same:
- Give the AI the rules (the cheat-sheet below).
- Describe your app in a sentence or two.
- Drop the two files it writes into
apps/<your-app>/and open it in Glance Dev Studio.
An app is just two files
Every GDN app is a folder with two files:
| File | What it is |
|---|---|
manifest.yaml | The settings: the app's name, size, how often it refreshes, and the input form the user fills in. |
app.star | The picture: Starlark (Python-like) code that draws each screen. |
See App fundamentals for the whole model. The AI writes both files; you review and preview them.
Step 1: give the AI this cheat-sheet
Copy everything in the box and paste it into your chat before you describe your app. It teaches the assistant the platform's rules:
You are writing an app for the Glance Developer Network (GDN): an app that renders
to a Glance LED panel. The panel is always 32 pixels tall. Each panel module is
64 pixels wide and panels daisy-chain up to 384 pixels wide; for best performance keep
images to 192x32 or smaller and split content across multiple pages. An app is a FOLDER
with two files:

  manifest.yaml  - settings: id, name, width, height, refresh (seconds),
                   pages: [list of screen names], and inputs (the user's form).
  app.star       - Starlark (Python-like) code. Define ONE function per page:
                   def <page>(c, ctx): ...  It DRAWS a picture; it never returns
                   anything. c = the canvas, ctx.inputs = the user's values,
                   ctx.now = the current time (UTC).

Coordinates: (0,0) is top-left, x grows right, y grows down. For text and images,
(x, y) is the TOP-LEFT corner. Circles/dots center on their coordinates.

Drawing (c.*):
  fill(color) / clear() ; pixel(x,y,color) ; rect(x0,y0,x1,y1,fill=,outline=)
  line(x0,y0,x1,y1,color) ; text(s,x,y,font="5x7",color="white",align="left")
  image("file.png",x,y,w=,h=) ; bitmap([[0,1,...],...],x,y,color)
Helpers (composites, prefer these): circle, fill_circle, round_rect, hline, vline,
  gradient_rect, text_center, text_right, text_wrapped, text_fit,
  progress_bar, sparkline, bars, badge, trend_arrow, icon("sun"), sprite,
  header, kv, stat, gauge, status_dot, table, scoreboard, grid, color.dim.
Colors: names ("green","amber","red","white",...) or hex ("#00FF00").
Fonts: "4x5","5x7","6x8","7x12","16x24", etc.

HARD RULES:
- Fonts are UPPERCASE ONLY. Call .upper() on any text, or nothing draws.
- Frames are STILL IMAGES. Don't animate or scroll; the panel re-renders on the
  manifest's `refresh` timer, so let the next refresh show new data.
- Draw immediately with c.*; there is no widget tree and you never return anything.
- Lay things out by hand; the panel is only 32px tall, so keep text short.
- To fetch live data, call http.get(url, headers={}, params={}, ttl_seconds=300);
  it returns {status_code, body, json}. ALWAYS check status_code before using json.
- Read inputs with ctx.inputs.get("key", fallback). Declare each input in the
  manifest with app_input_type: free-text|dropdown|checkbox|date|date-past|color|selection.

Give me BOTH files, complete. Keep text short and high-contrast.
Step 2: describe your app
Right after the cheat-sheet, say what you want. A sentence works, but naming your inputs and the panel width gets you a better result:
Build me a GDN app that shows <what it shows>, with inputs for <the settings a
user should be able to change>. Target a 128x32 panel. Use helpers where they fit.
For example:
Build me a GDN app that shows a habit streak: a big day-count with a small label
and a progress bar toward a goal. Inputs: the habit name and the goal number.
Step 3: put it in your apps folder
The easiest way is to let Glance Dev Studio make the folder for you:
click Create New App, and Studio creates the app folder plus starter manifest.yaml
and app.star files, then you paste the AI's code over them. Studio is the more
user-friendly option. See Create a new app.
If you'd rather do it by hand, the AI hands you two files, and getting them into
apps/<your-app>/ is covered in
Getting the AI's files into your project,
then open it in Studio to see it live.
Always preview it. The two mistakes assistants make most are lowercase text
(fonts are uppercase-only, so lowercase draws nothing) and forgetting to check
status_code before reading http.get data. gdn check apps/<id> and the live
preview catch both in seconds.
Keep going
- Choosing your AI tool: browser vs.
installed, with download and video links, and where the AI's two files go in
apps/. - Working with images: importing, sizing, and placing a logo or icon, including dragging it into place in Studio.
- Examples & lessons: real prompts for popular app types, and the mistakes to avoid.
- Example: top 5 movies: a full, iterative build against a real API, from plain list to polished poster card.